Tablespace Monitor
#!/bin/sh
. /d01/oracle/VIS/db/tech_st/11.1.0/VIS_oracle.env
cat /home/oracle/VISION/tablespace.log
sqlplus '/ as sysdba' << EOF
set feedback off echo off
set linesize 100
set pagesize 200
set colsep |
SET TRIMSPOOL ON
spool /home/oracle/VISION/tablespace.log
SELECT df.tablespace_name TABLESPACE, df.total_space_mb TOTAL_SPACE_MB,
(df.total_space_mb - fs.free_space_mb) USED_SPACE_MB, fs.free_space_mb FREE_SPACE_MB,
ROUND(100 * (fs.free_space / df.total_space),2) PCT_FREE
FROM (SELECT tablespace_name, SUM (bytes) TOTAL_SPACE,
ROUND( SUM (bytes) / 1048576) TOTAL_SPACE_MB
FROM dba_data_files GROUP BY tablespace_name) df,
(SELECT tablespace_name, SUM (bytes) FREE_SPACE, ROUND( SUM (bytes) / 1048576) FREE_SPACE_MB
FROM dba_free_space GROUP BY tablespace_name) fs
WHERE df.tablespace_name = fs.tablespace_name(+) ORDER BY ROUND(100 * (fs.free_space / df.total_space),2);
spool off
exit
EOF
if [ `cat /home/oracle/VISION/tablespace.log|wc -l` -gt 0 ]
then
cat /home/oracle/VISION/tablespace.log >> /home/oracle/VISION/mailcontent
cat /home/oracle/VISION/tablespace.log |mailx -s "Tablespace Monitor" amila@aitkenspence.lk
rm -rf /home/oracle/VISION/tablespace.log
rm -rf /home/oracle/VISION/mailcontent
fi
Temporary Tablespace Monitor
#!/bin/sh
. /d01/oracle/VIS/db/tech_st/11.1.0/VIS_oracle.env
cat /home/oracle/VISION/tablespace.log
sqlplus '/ as sysdba' << EOF
set feedback off echo off
set linesize 100
set pagesize 200
set colsep |
SET TRIMSPOOL ON
spool /home/oracle/VISION/tablespace.log
SELECT A.tablespace_name tablespace, D.mb_total,
SUM (A.used_blocks * D.block_size) / 1024 / 1024 mb_used,
D.mb_total - SUM (A.used_blocks * D.block_size) / 1024 / 1024 mb_free
FROM v\$sort_segment A,
(
SELECT B.name, C.block_size, SUM (C.bytes) / 1024 / 1024 mb_total
FROM v\$tablespace B, v\$tempfile C
WHERE B.ts#= C.ts#
GROUP BY B.name, C.block_size
) D
WHERE A.tablespace_name = D.name
GROUP by A.tablespace_name, D.mb_total;
spool off
exit
EOF
if [ `cat /home/oracle/VISION/tablespace.log|wc -l` -gt 0 ]
then
cat /home/oracle/VISION/tablespace.log >> /home/oracle/VISION/mailcontent
cat /home/oracle/VISION/tablespace.log |mailx -s "Temporary Tablespace Monitor" amila@aitkenspence.lk
rm -rf /home/oracle/VISION/tablespace.log
rm -rf /home/oracle/VISION/mailcontent
fi
Invalid Objects Monitor
#!/bin/sh
. /d01/oracle/VIS/db/tech_st/11.1.0/VIS_oracle.env
cat /home/oracle/VISION/invalidobj.log
sqlplus '/ as sysdba' << EOF
set feedback off echo off
set linesize 100
set pagesize 200
set colsep |
column OBJECT_NAME format 999999
column OBJECT_NAME format a30
spool /home/oracle/VISION/invalidobj.log
SELECT OWNER, OBJECT_NAME , OBJECT_TYPE "ObjType"
FROM DBA_OBJECTS
WHERE STATUS = 'INVALID'
ORDER BY OWNER, OBJECT_TYPE, OBJECT_NAME;
spool off
exit
EOF
if [ `cat /home/oracle/VISION/invalidobj.log|wc -l` -gt 0 ]
then
cat /home/oracle/VISION/invalidobj.log >> /home/oracle/VISION/mailcontentobj
cat /home/oracle/VISION/invalidobj.log |mailx -s "Invalid Objects" amila@aitkenspence.lk
rm -rf /home/oracle/VISION/invalidobj.log
rm -rf /home/oracle/VISION/mailcontentobj
fi
Tuesday, October 2, 2012
Tuesday, August 7, 2012
Oracle EBS R12 Database Memory Parameters
Database Initialization Parameters for Oracle E-Business Suite Release 12 [ID 396009.1] SELECT ROUND(SUM(BYTES)/1024/1024,2) TOTAL_SGA,
ROUND(SUM(DECODE(NAME,'free memory',BYTES,0))/1024/1024,2) FREE,
ROUND((SUM(DECODE(NAME,'free memory',BYTES,0))/1024/1024)/(SUM(BYTES)/1024/1024)*100,2) FREE_PER
FROM V$SGASTAT
SELECT POOL, SUM(BYTES) FROM V$SGASTAT
WHERE POOL IS NOT NULL GROUP BY POOL
ORDER BY POOL;Memory Management Data Dictionary ViewsThe following dynamic performance views provide information on memory management:
| View | Description |
|---|---|
V$SGA |
Displays summary information about the system global area (SGA). |
V$SGAINFO |
Displays size information about the SGA, including the sizes of different SGA components, the granule size, and free memory. |
V$SGASTAT |
Displays detailed information about how memory is allocated within the shared pool, large pool, Java pool, and Streams pool. |
V$PGASTAT |
Displays PGA memory usage
statistics as well as statistics about the automatic PGA memory manager
when it is enabled (that is, when PGA_AGGREGATE_TARGET is set). Cumulative values in V$PGASTAT are accumulated since instance startup. |
V$MEMORY_DYNAMIC_COMPONENTS |
Displays information on the current size of all automatically tuned and static memory components, with the last operation (for example, grow or shrink) that occurred on each. |
V$SGA_DYNAMIC_COMPONENTS |
Displays the current sizes of all SGA components, and the last operation for each component. |
V$SGA_DYNAMIC_FREE_MEMORY |
Displays information about the amount of SGA memory available for future dynamic SGA resize operations. |
V$MEMORY_CURRENT_RESIZE_OPS |
Displays information about resize operations that are currently in progress. A resize operation is an enlargement or reduction of the SGA, the instance PGA, or a dynamic SGA component. |
V$SGA_CURRENT_RESIZE_OPS |
Displays information about dynamic SGA component resize operations that are currently in progress. |
V$MEMORY_RESIZE_OPS |
Displays information about
the last 800 completed memory component resize operations, including
automatic grow and shrink operations for SGA_TARGET and PGA_AGGREGATE_TARGET. |
V$SGA_RESIZE_OPS |
Displays information about the last 800 completed SGA component resize operations. |
V$MEMORY_TARGET_ADVICE |
Displays information that helps you tune MEMORY_TARGET if you enabled automatic memory management. |
V$SGA_TARGET_ADVICE |
Displays information that helps you tune SGA_TARGET. |
V$PGA_TARGET_ADVICE |
Displays information that helps you tune PGA_AGGREGATE_TARGET. |
Friday, July 13, 2012
Extract cpio files
Following command can be used to extract cpio files.
cpio -idmv < databasebackup.cpio
cpio -idmv < databasebackup.cpio
Thursday, July 12, 2012
Set Timezone in Redhat Linux
Edit the /etc/sysconfig/clock and set the time zone as following.
# The ZONE parameter is only evaluated by system-config-date.
# The timezone of the system is defined by the contents of /etc/localtime.
ZONE=Asia/Colombo
UTC=false
ARC=false
Then set the TZ variable as follows or set it in the .bash_profile.
export TZ=/usr/share/zoneinfo/Asia/Colombo
Now check the date/time using date command.
Also the command tzselect can be used to change the time zone.
Tuesday, May 22, 2012
Oracle EBS R12 Log File Location
- Startup/Shutdown Log files: $INST_TOP/logs/appl/admin/log
- Patch log: $APPL_TOP/admin/$SID/log
- Autoconfig log file:
Apps: $INST_TOP/apps/$CONTEXT_NAME/admin/log/$MMDDHHMM/adconfig.log
DB: $ORACLE_HOME/appsutil/log/$CONTEXT_NAME/<MMDDHHMM>/adconfig.log
$ORACLE_HOME/appsutil/log/$CONTEXT_NAME/<MMDDHHMM>/NetServiceHandler.log
- Concurrent log: $INST_TOP/apps/$CONTEXT_NAME/logs/appl/conc/log
- Apache, OC4J and OPMN:
$LOG_HOME/ora/10.1.3/Apache
$LOG_HOME/ora/10.1.3/j2ee
$LOG_HOME/ora/10.1.3/opmn
- Alert Log File: $ORACLE_HOME/admin/$CONTEXT_NAME/bdump/alert_$SID.log
- Clone log:
Preclone log files in source instance
Apps: $INST_TOP/apps/$CONTEXT_NAME/admin/log/ (StageAppsTier_MMDDHHMM.log)
DB: $ORACLE_HOME/appsutil/log/$CONTEXT_NAME/(StageDBTier_MMDDHHMM.log)
Clone log files in target instance
Apps : $INST_TOP/apps/$CONTEXT_NAME/admin/log/ApplyAppsTier_<time>.log
DB: $ORACLE_HOME/appsutil/log/$CONTEXT_NAME/ApplyDBTier_<time>.log
For more information check for following metalink documents.
How to find location of Install, Autoconfig, Patching , Clone and other logs in R12 [ID 804603.1]
Oracle Application Server Diagnostic Tools and Log Files in Applications Release 12 [ID 454178.1]
Monday, April 23, 2012
DR Site Implementation
Oracle E-Business Suite Release 12 High Availability Documentation Roadmap [ID 1072636.1]
Business Continuity for Oracle E-Business Release 12 Using Oracle 11g Physical Standby Database [ID 1070033.1]
ORACLE RESTART - Physical Standby Database Is Started In Mode "Open, Readonly" After Server Reboot [ID 1436313.1]
Data Guard Real-Time Apply FAQ [ID 828274.1]
Creating a Physical Standby Database on Oracle 11.2.0.x [ID 1475344.1]
Redo Transport Compression in a Data Guard Environment [ID 729551.1]
How to Add Second Standby in Existing Dataguard Configuration With Broker Using DGMGRL (Doc ID 842822.1)
Wednesday, April 18, 2012
Tape Backup & Restore Commands
Display the content of the tape.
tar tvf /dev/st0
To backup data to tape with compression
tar cvzf /dev/st0 /u01/ebiz
To restore entire data from the tape
tar -xvf /dev/st0 -C /u01/amila
To restore specific file from the tape
tar -xvf /dev/st0 u01/ebiz/db/tech_st/11.1.0/VIS_oracle.env -C /u01/amila
More good references:
http://www.ravisaive.in/2011/09/linux-tape-backup-with-tar-mt.html
http://www.cyberciti.biz/faq/linux-tape-backup-with-mt-and-tar-command-howto/
Wednesday, March 28, 2012
Oracle EBS R12 – Rapid Cloning
1. Copy the source system (PROD) to the target (TEST) system
First, the full file system backup (The TAR files) of the Oracle EBS production system should be copied to the test server. Then TAR files should be extracted to the location/mount point where required space available.
2. Recreate the Symbolic Links of the target (TEST) system
The symbolic links libclntsh.so.10.1 in [RDBMS ORACLE_HOME]/lib and [RDBMS ORACLE_HOME]/lib32 folders should be pointing to the file libclntsh.so in same folder. If the symbolic link libclntsh.so.10.1 NOT points to the correct path of the file libclntsh.so, the symbolic link libclntsh.so.10.1 should be deleted and recreated by using following commands.
[root@oracle lib]$ rm libclntsh.so.10.1
[root@oracle lib]$ ln -s [RDBMS ORACLE_HOME]/lib/libclntsh.so libclntsh.so.10.1
[root@oracle lib32]$ rm libclntsh.so.10.1
[root@oracle lib32]$ ln -s [RDBMS ORACLE_HOME]/lib32/libclntsh.so libclntsh.so.10.1
Note: If the symbolic links are pointing to the correct path please IGNORE this step.
3. Create a new OS User, Set User Ownership and Permissions for the entire file system
A new OS user should be created on the test server and the user should be added to the dba group.
[root@oracle /]$ useradd -g dba -d /home/oracle -m oracle
Then the entire file system should be given the permission and ownership should be set for the above user.
[root@oracle TEST]$ chmod –R 777 apps inst db
[root@oracle TEST]$ chown –R oracle:dba apps inst db
4. Configure(Clone) the target(TEST) system
After completing above steps, now the target file system is ready to configure (clone) as a new test system. First the TEST system database should be cloned and then the TEST system application should be cloned. These cloning commands should be executed through the new OS user created (ORACLE).
First move to the below path and execute the following command to start the Database Tier Cloning.
[oracle@oracle TEST]$ cd [RDBMS ORACLE_HOME]/appsutil/clone/bin
[oracle@oracle bin]$ perl adcfgclone.pl dbTier
*** Example [RDBMS ORACLE_HOME] would be /u01/finsys/db/tech_st/11.1.0.
Then move to the below path and execute the following command to start the Application Tier Cloning.
[oracle@oracle TEST]$ cd [COMMON_TOP]/clone/bin
[oracle@oracle bin]$ perl adcfgclone.pl appsTier
*** Example [COMMON_TOP] would be /u01/finsys/apps/apps_st/comn
Following metalink documents could be referenced to get more
information on Oracle EBS R12 cloning.
Cloning Oracle Applications Release 12 with Rapid Clone [ID 406982.1]
Using AutoConfig to Manage System Configurations in Oracle E-Business Suite Release 12 [ID 387859.1]
RC-20200: Fatal: Could not find Unzip. At this time only Native UnZip 5.X is supported (Doc ID 1410514.1)
Cloning Oracle Applications Release 12 with Rapid Clone [ID 406982.1]
Using AutoConfig to Manage System Configurations in Oracle E-Business Suite Release 12 [ID 387859.1]
RC-20200: Fatal: Could not find Unzip. At this time only Native UnZip 5.X is supported (Doc ID 1410514.1)
Thursday, March 15, 2012
Usage of FNDCPASS Utility
FNDCPASS <APPS username>/<APPS password> 0 Y <SYSTEM username>/<SYSTEM password> <token> <username> <new_password>
Following are the FNDCPASS Utility options that could be used with
different <token>.
1. Change the APPS and APPLSYS
schema password
The SYSTEM token is used when changing the APPLSYS password.
FNDCPASS <logon> 0 Y <system/password> SYSTEM
<username> <new_password>
FNDCPASS apps/apps 0 Y system/manager SYSTEM APPLSYS WELCOME
2. Change an Oracle Applications
schema password (other than APPS/APPLSYS)
The ORACLE token is used when changing a SINGLE Applications schema
password.
FNDCPASS <logon> 0 Y <system/password> ORACLE
<username> <new_password>
FNDCPASS apps/apps 0 Y system/manager ORACLE GL GL1
3. Change all ORACLE schema
passwords
The ALLORACLE token is used when changing ALL Applications schema
passwords.
FNDCPASS <logon> 0 Y <system/password> ALLORACLE
<new_password>
FNDCPASS apps/apps 0 Y system/manager ALLORACLE WELCOME
4. Change an Oracle Applications
user's password
The USER token is used when changing an Applications USER password.
FNDCPASS <logon> 0 Y <system/password> USER
<username> <new_password>
FNDCPASS apps/apps 0 Y system/manager USER VISION WELCOME
Important : Oracle Applications system should be shut down before changing any schema passwords. Also FND_USER and FND_ORACLE_USERID tables should be backed up before changing any passwords.
Important : Oracle Applications system should be shut down before changing any schema passwords. Also FND_USER and FND_ORACLE_USERID tables should be backed up before changing any passwords.
Refer My Oracle Support Document for more information.
ID 437260.1 - How to Change Applications Passwords using Applications Schema Password
Change Utility (FNDCPASS or AFPASSWD)
Monday, March 12, 2012
Profiles and Password Verify Function - Oracle 11g
Verify Function is a quick and easy way to enforce quality of database passwords—for example, they should contain a certain number of characters, should not be identical to the username, and so on.
In Oracle Database 11g, verify_fnction_11g function could be found on password verification file utlpwdmg.sql in $ORACLE_HOME/rdbms/admin.
At the end of the script following lines are available.
ALTER PROFILE DEFAULT LIMIT
PASSWORD_LIFE_TIME 180
PASSWORD_GRACE_TIME 7
PASSWORD_REUSE_TIME UNLIMITED
PASSWORD_REUSE_MAX UNLIMITED
FAILED_LOGIN_ATTEMPTS 10
PASSWORD_LOCK_TIME 1
PASSWORD_VERIFY_FUNCTION verify_function_11G;
By executing this script utlpwdmg.sql, it will attach the function to the profile DEFAULT, which is the default profile for all users.
Following query can be used to check the profile of the all users.
SELECT * FROM DBA_PROFILES WHERE PROFILE = 'DEFAULT'
Following query can be used to check the users who have the DEFAULT profile assigned.
SELECT USERNAME, PROFILE FROM DBA_USERS
-----------------------------------------------------------------------------------------------------------------
Tuesday, February 21, 2012
RMAN Setup
Setups in CATALOG database
Create a tablespace in catalog database and assign it to the user rman.
CREATE TABLESPACE CAT1 DATAFILE '/d04/oradata/catalog/rman.dbf' SIZE 100M AUTOEXTEND ON;
CREATE USER rman IDENTIFIED BY rman
DEFAULT TABLESPACE CAT1
TEMPORARY TABLESPACE TEMP QUOTA UNLIMITED ON CAT1;
grant connect,resource,recovery_catalog_owner to rman;
Type rman
RMAN> CONNECT CATALOG RMAN/RMAN
connected to recovery catalog database
RMAN> CREATE CATALOG;
recovery catalog created
Setups in TARGET database
create user backup_admin identified by backup_admin default tablespace users;
grant sysdba to backup_admin;
[oratest@oracle 11.1.0]$ rman target backup_admin/backup_admin@test catalog=rman/rman@catalog
Recovery Manager: Release 11.1.0.7.0 - Production on Tue Feb 21 23:39:22 2012
Copyright (c) 1982, 2007, Oracle. All rights reserved.
connected to target database: TEST (DBID=2072291809)
connected to recovery catalog database
RMAN> register database;
database registered in recovery catalog
starting full resync of recovery catalog
full resync complete
RMAN> show all;
RMAN configuration parameters for database with db_unique_name TEST are:
CONFIGURE RETENTION POLICY TO REDUNDANCY 1; # default
CONFIGURE BACKUP OPTIMIZATION OFF; # default
CONFIGURE DEFAULT DEVICE TYPE TO DISK; # default
CONFIGURE CONTROLFILE AUTOBACKUP OFF; # default
CONFIGURE CONTROLFILE AUTOBACKUP FORMAT FOR DEVICE TYPE DISK TO '%F'; # default
CONFIGURE DEVICE TYPE DISK PARALLELISM 1 BACKUP TYPE TO BACKUPSET; # default
CONFIGURE DATAFILE BACKUP COPIES FOR DEVICE TYPE DISK TO 1; # default
CONFIGURE ARCHIVELOG BACKUP COPIES FOR DEVICE TYPE DISK TO 1; # default
CONFIGURE MAXSETSIZE TO UNLIMITED; # default
CONFIGURE ENCRYPTION FOR DATABASE OFF; # default
CONFIGURE ENCRYPTION ALGORITHM 'AES128'; # default
CONFIGURE COMPRESSION ALGORITHM 'BZIP2'; # default
CONFIGURE ARCHIVELOG DELETION POLICY TO NONE; # default
CONFIGURE SNAPSHOT CONTROLFILE NAME TO '/d03/oracle/TEST/db/tech_st/11.1.0/dbs/snapcf_TEST.f'; # default
RMAN commands
RMAN> show controlfile autobackup format;
RMAN> show exclude;
RMAN> show all;
RMAN> configure backup optimization clear;
RMAN> configure maxsetsize clear;
RMAN> configure default device type clear;
Following configurations could be done to get a whole database backup.
RMAN> configure default device type to disk;
RMAN> configure default device type disk backup type to copy;
RMAN> configure controlfile autobackup on;
Oracle10g / 11g - Getting Started with Recovery Manager (RMAN) [ID 360416.1]
++ Merged Incremental Backup Strategies (Doc ID 745798.1)
++ Incrementally Updated Backup In 10G and higher (Doc ID 303861.1)
++ RMAN Fast Incremental Backups (Doc ID 262853.1)
++ Rman Fails to Find Level 0 Backup on Restore/Recovery of Incremental Backups (Doc ID 341861.1)
++ Encountered RMAN-03002 and RMAN-06091 when Deleting Obsolete Backups (Doc ID 567555.1)
ORA Error Codes
ORA-00059: maximum number of DB_FILES exceeded
Get the db_files parameter value from the following SQL or using pfile.
select value from v$parameter where name = ‘db_files’;
Get the count of the datafiles created
select count(*) from v$datafile;
When exceeding the db_files parameter ORA-00059 error given.
Increasing the value of the db_files parameter will resolve the problem.
ORA-01102: cannot mount database in EXCLUSIVE mode
Oracle Database Configuration
Set the .bash_profile
ORACLE_HOME=/d04/product/11.2.0/dbhome_1
export ORACLE_HOME
ORACLE_SID=DEV
export ORACLE_SID
PATH=$PATH:$ORACLE_HOME/bin
export PATH
Create pfile from spfile
CREATE PFILE = '/d04/product/11.2.0/dbhome_1/dbs/initDEV.ora'
FROM SPFILE = '/d04/product/11.2.0/dbhome_1/dbs/spfiledev.ora';
Enable archivelog mode
Thursday, February 16, 2012
How to change the Oracle EBS R12 listener port
Refer following metalink document.
How to change the Web Listener Port number in Oracle E-Business Suite Release 12? [ID 760590.1]
How to change the Web Listener Port number in Oracle E-Business Suite Release 12? [ID 760590.1]
Tuesday, February 14, 2012
Oracle EBS Upgrade - 12.1.1 to 12.1.3
Oracle EBS upgrade from R12.1.1 to R12.1.3
Refer the following my Oracle Support document.
Oracle E-Business Suite Release 12.1.3 Readme [ID 1080973.1]
To apply Oracle E-Business Suite Release 12.1.3, follow these steps:
Refer the following my Oracle Support document.
Oracle E-Business Suite Release 12.1.3 Readme [ID 1080973.1]
To apply Oracle E-Business Suite Release 12.1.3, follow these steps:
- Use AutoPatch to apply R12.AD.B.DELTA.3 Patch 9239089.Note: Do not merge this patch with any other patch. R12.AD.B.Delta.3 must be applied separately.
- Use AutoPatch to apply Oracle E-Business Suite Release 12.1.3 Patch 9239090 and follow the instructions in the patch readme file.
- Use AutoPatch to apply the latest consolidated online help Patch 9239095 and follow the instructions in the patch readme file.
- Apply mandatory Patch 9817770 (9817770:R12.ATG_PF.B [POST-R12.ATG_PF.B.DELTA.3 CONSOLIDATED PATCH].)
- Apply mandatory Patch 9966055 (9966055:R12.FND.B [TRANSLATED VERSION OF FNDSCSGN NOT LAUNCHED].)
Friday, February 3, 2012
Configure DBConsole for Oracle EBS R12 Database
Configure the DBConsole Repository
Following command can be executed to configure DBConsole along with the repository.
Change the directory to database ORACLE_HOME and execute the environment file.
[oratest@oracle 11.1.0]$ . TEST_oracle.env
Then move to [ORACLE_HOME]/bin and execute the following command.
[oratest@oracle bin]$ emca -config dbcontrol db -repos create


Start/Stop & Check DBconsole Status
Then using the emctl command DBconsole could be started, stopped and also status could be checked.
[oratest@oracle bin]$ emctl start dbconsole
[oratest@oracle bin]$ emctl stop dbconsole
[oratest@oracle bin]$ emctl status dbconsole
Oracle Enterprise Manager 11g Database Control Release 11.1.0.7.0
Copyright (c) 1996, 2008 Oracle Corporation. All rights reserved.
https://oracle.calspence.lk:1158/em/console/aboutApplication
Oracle Enterprise Manager 11g is running.
------------------------------------------------------------------
Logs are generated in directory /d03/oracle/TEST/db/tech_st/11.1.0/oracle.calspence.lk_TEST/sysman/log
Now can login through the sys user.

Refer following metalink document for more information.
Master Note for Enterprise Manager Configuration Assistant (EMCA) in Single Instance Database Environment [ID 1099271.1]
Thursday, February 2, 2012
Oracle EBS R12 Installation
Requirements & Steps
File system space required for Standard Installation as follows.


File system space required for Standard Installation as follows.
- Applications node file system (includes OracleAS 10.1.2 Oracle Home, OracleAS 10.1.3 Oracle Home, COMMON_TOP, APPL_TOP, and INST_TOP) 35 GB
- Database node file system (Fresh install) 55 GB
- Database node file system (Vision Demo database) 208 GB
- Linux x86 - [ Note ID: 761564.1 ]
- Linux x86-64 (64-bit) - [ Note ID - 761566.1]
- First copy all installation disks in to the server.
- create a directory for installation (d03).
- Also set the /etc/oraInst.loc as inventory_loc=/d03/oraInventory. If there is no oraInst.loc file, create a new file.
- Installation can be done through single user or multiple users.
- For single user installation, ORACLE user can be used for both DB & Apps tier file systems.
- For multiple user installation, ORACLE user can be used for DB tier file system and APPLMGR can be used for Apps tier file system.
- Then go to the /StageR12/startCD/Disk1/rapidwiz directory and execute ./rapidwiz
- Then following screens will appear and after entering necessary parameters, can proceed with the installation.
- In the process of the installation, you can either install a Vision Demo Instance or a Fresh Instance by selecting the database type.


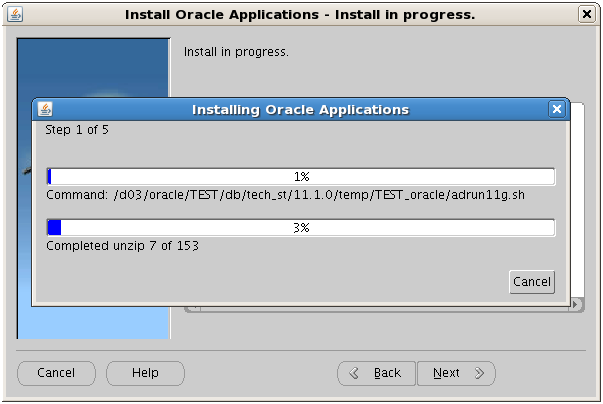


Wednesday, February 1, 2012
Manage Tablespaces
Query to Monitor Tablespace.
This query could be executed through the database SYS user.
SELECT df.tablespace_name TABLESPACE, df.total_space TOTAL_SPACE,
fs.free_space FREE_SPACE, df.total_space_mb TOTAL_SPACE_MB,
(df.total_space_mb - fs.free_space_mb) USED_SPACE_MB, fs.free_space_mb FREE_SPACE_MB,
ROUND(100 * (fs.free_space / df.total_space),2) PCT_FREE
FROM (SELECT tablespace_name, SUM (bytes) TOTAL_SPACE,
ROUND( SUM (bytes) / 1048576) TOTAL_SPACE_MB
FROM dba_data_files GROUP BY tablespace_name) df,
(SELECT tablespace_name, SUM (bytes) FREE_SPACE, ROUND( SUM (bytes) / 1048576) FREE_SPACE_MB
FROM dba_free_space GROUP BY tablespace_name) fs
WHERE df.tablespace_name = fs.tablespace_name(+) ORDER BY ROUND(100 * (fs.free_space / df.total_space),2)
Manage Tablespaces Filled
Whenever a particular tablespace has been filled or it is reaching its maximum size there are two options that could be carried out to provide an uninterrupted service to users through Oracle EBS.
1. Resize the datafile of the particular tablespace.
ALTER DATABASE DATAFILE '/d01/oracle/VIS/db/apps_st/data/data01.dbf' RESIZE 2048M;
2. Add a datafile to a tablespace
First get the TS# of a particular tablespace below query.
SELECT TS# FROM V$TABLESPACE WHERE NAME=UPPER('APPS_TS_TX_DATA'); Then get the last created datafile from second query by passing TS#.
SELECT CREATION_TIME,NAME,BYTES/(1024*1024)
FROM V$DATAFILE WHERE TS# = '20'
ORDER BY CREATION_TIME DESC
Then add a new datafile to the particular tablespace.
ALTER TABLESPACE APPS_TS_TX_DATA ADD DATAFILE '/d01/oracle/VIS/db/apps_st/data/data02.dbf' SIZE 1024M;
Set Default Temporary Tablespace
Users who are not explicitly assigned a temporary tablespace use the database default temporary tablespace, which for new installations is TEMP. The default temporary tablespace for the database could be changed with the following command:
ALTER DATABASE DEFAULT TEMPORARY TABLESPACE tablespace_name;
To determine the current default temporary tablespace for the database, run the following query through SYS user:
SELECT PROPERTY_NAME, PROPERTY_VALUE FROM DATABASE_PROPERTIES WHERE
PROPERTY_NAME='DEFAULT_TEMP_TABLESPACE';
PROPERTY_NAME PROPERTY_VALUE
-------------------------- ------------------------------
DEFAULT_TEMP_TABLESPACE TEMP
Viewing Space Usage for Temporary Tablespaces
The DBA_TEMP_FREE_SPACE dictionary view contains information about space usage for each temporary tablespace. The information includes the space allocated and the free space.
SELECT * from DBA_TEMP_FREE_SPACE;
TABLESPACE_NAME TABLESPACE_SIZE ALLOCATED_SPACE FREE_SPACE
----------------------------------- --------------- --------------- ----------
TEMP 250609664 250609664 249561088
Also dba_temp_files and v$tempfile can be used to get the temporary tablespace information.
Some important queries for Temporary Tablespaces
SELECT * FROM DATABASE_PROPERTIES WHERE PROPERTY_NAME='DEFAULT_TEMP_TABLESPACE';
SELECT TABLESPACE_NAME, BYTES_USED, BYTES_FREE FROM V$TEMP_SPACE_HEADER;
Add and Resize Tempfiles
ALTER TABLESPACE temp1 ADD TEMPFILE '/u01/findb/db/apps_st/data/temp01a.dbf' SIZE 4096M;
ALTER DATABASE TEMPFILE '/u01/findb/db/apps_st/data/temp01a.dbf' RESIZE 4096M;
Check Autoextend for the datafiles.
select tablespace_name, file_name, bytes/1048576 File_Size_MB, autoextensible, increment_by
from dba_data_files order by file_id
Get the objects consumed by SYSAUX tablespace
SELECT * FROM V$SYSAUX_OCCUPA
Queries for UNDO Calculation
select
( select sum(bytes)/1024/1024 from dba_data_files
where tablespace_name like 'UND%' ) allocated,
( select sum(bytes)/1024/1024 from dba_free_space
where tablespace_name like 'UND%') free,
( select sum(bytes)/1024/1024 from dba_undo_extents
where tablespace_name like 'UND%') USed
from dual
SELECT (UR * (UPS * DBS)) AS "Bytes"
FROM (SELECT value AS UR FROM v$parameter WHERE name = 'undo_retention'),
(SELECT undoblks/((end_time-begin_time)*86400) AS UPS
FROM v$undostat
WHERE undoblks = (SELECT MAX(undoblks) FROM v$undostat)),
(SELECT block_size AS DBS
FROM dba_tablespaces
WHERE tablespace_name = (SELECT UPPER(value) FROM v$parameter WHERE name = 'undo_tablespace'));
SELECT undoblks/((end_time-begin_time)*86400) "Peak Undo Block Generation" FROM v$undostat WHERE undoblks=(SELECT MAX(undoblks) FROM v$undostat);
We can calculate size of UNDO_RETENTION in one query:
SELECT
d.undo_size/(1024*1024) "ACTUAL UNDO SIZE [MByte]",
SUBSTR(e.value,1,25) "UNDO RETENTION [Sec]",
ROUND((d.undo_size / (to_number(f.value) *
g.undo_block_per_sec))) "OPTIMAL UNDO RETENTION [Sec]"
FROM
(
SELECT
SUM(a.bytes) undo_size
FROM
v$datafile a,
v$tablespace b,
dba_tablespaces c
WHERE
c.contents = 'UNDO'
AND c.status = 'ONLINE'
AND b.name = c.tablespace_name
AND a.ts# = b.ts#
) d,
v$parameter e,
v$parameter f,
(
SELECT
MAX(undoblks/((end_time-begin_time)*3600*24)) undo_block_per_sec
FROM
v$undostat
) g
WHERE
e.name = 'undo_retention'
AND f.name = 'db_block_size';
Another single query to find optimum UNDO_RETENTION period;
SELECT d.undo_size/(1024*1024) as UNDO_SIZE,
SUBSTR(e.value,1,25) as UNDO_RETENTION,
ROUND((d.undo_size / (to_number(f.value) *
g.undo_block_per_sec))) as OPTIMUM_UNDO_RETENTION
FROM (
SELECT SUM(a.bytes) undo_size
FROM v$datafile a,
v$tablespace b,
dba_tablespaces c
WHERE c.contents = 'UNDO'
AND c.status = 'ONLINE'
AND b.name = c.tablespace_name
AND a.ts# = b.ts#
) d,
v$parameter e,
v$parameter f,
(
SELECT MAX(undoblks/((end_time-begin_time)*3600*24))
undo_block_per_sec
FROM v$undostat
) g
WHERE e.name = 'undo_retention'
AND f.name = 'db_block_size';
To find UNDO tablespace size according to the UNDO RETENTION period;
SELECT d.undo_size/(1024*1024) as UNDO_SIZE,
SUBSTR(e.value,1,25) as UNDO_RETENTION,
(TO_NUMBER(e.value) * TO_NUMBER(f.value) *
g.undo_block_per_sec) / (1024*1024)
as NEEDED_UNDO_SIZE
FROM (
SELECT SUM(a.bytes) undo_size
FROM v$datafile a,
v$tablespace b,
dba_tablespaces c
WHERE c.contents = 'UNDO'
AND c.status = 'ONLINE'
AND b.name = c.tablespace_name
AND a.ts# = b.ts#
) d,
v$parameter e,
v$parameter f,
(
SELECT MAX(undoblks/((end_time-begin_time)*3600*24))
undo_block_per_sec
FROM v$undostat
) g
WHERE e.name = 'undo_retention'
AND f.name = 'db_block_size';
How To Size UNDO Tablespace For Automatic Undo Management (Doc ID 262066.1)
Master Note for ORA-1555 Errors (Doc ID 1307334.1)
This query could be executed through the database SYS user.
SELECT df.tablespace_name TABLESPACE, df.total_space TOTAL_SPACE,
fs.free_space FREE_SPACE, df.total_space_mb TOTAL_SPACE_MB,
(df.total_space_mb - fs.free_space_mb) USED_SPACE_MB, fs.free_space_mb FREE_SPACE_MB,
ROUND(100 * (fs.free_space / df.total_space),2) PCT_FREE
FROM (SELECT tablespace_name, SUM (bytes) TOTAL_SPACE,
ROUND( SUM (bytes) / 1048576) TOTAL_SPACE_MB
FROM dba_data_files GROUP BY tablespace_name) df,
(SELECT tablespace_name, SUM (bytes) FREE_SPACE, ROUND( SUM (bytes) / 1048576) FREE_SPACE_MB
FROM dba_free_space GROUP BY tablespace_name) fs
WHERE df.tablespace_name = fs.tablespace_name(+) ORDER BY ROUND(100 * (fs.free_space / df.total_space),2)
Manage Tablespaces Filled
Whenever a particular tablespace has been filled or it is reaching its maximum size there are two options that could be carried out to provide an uninterrupted service to users through Oracle EBS.
1. Resize the datafile of the particular tablespace.
ALTER DATABASE DATAFILE '/d01/oracle/VIS/db/apps_st/data/data01.dbf' RESIZE 2048M;
2. Add a datafile to a tablespace
First get the TS# of a particular tablespace below query.
SELECT TS# FROM V$TABLESPACE WHERE NAME=UPPER('APPS_TS_TX_DATA'); Then get the last created datafile from second query by passing TS#.
SELECT CREATION_TIME,NAME,BYTES/(1024*1024)
FROM V$DATAFILE WHERE TS# = '20'
ORDER BY CREATION_TIME DESC
Then add a new datafile to the particular tablespace.
ALTER TABLESPACE APPS_TS_TX_DATA ADD DATAFILE '/d01/oracle/VIS/db/apps_st/data/data02.dbf' SIZE 1024M;
Set Default Temporary Tablespace
Users who are not explicitly assigned a temporary tablespace use the database default temporary tablespace, which for new installations is TEMP. The default temporary tablespace for the database could be changed with the following command:
ALTER DATABASE DEFAULT TEMPORARY TABLESPACE tablespace_name;
To determine the current default temporary tablespace for the database, run the following query through SYS user:
SELECT PROPERTY_NAME, PROPERTY_VALUE FROM DATABASE_PROPERTIES WHERE
PROPERTY_NAME='DEFAULT_TEMP_TABLESPACE';
PROPERTY_NAME PROPERTY_VALUE
-------------------------- ------------------------------
DEFAULT_TEMP_TABLESPACE TEMP
Viewing Space Usage for Temporary Tablespaces
The DBA_TEMP_FREE_SPACE dictionary view contains information about space usage for each temporary tablespace. The information includes the space allocated and the free space.
SELECT * from DBA_TEMP_FREE_SPACE;
TABLESPACE_NAME TABLESPACE_SIZE ALLOCATED_SPACE FREE_SPACE
----------------------------------- --------------- --------------- ----------
TEMP 250609664 250609664 249561088
Also dba_temp_files and v$tempfile can be used to get the temporary tablespace information.
Some important queries for Temporary Tablespaces
SELECT * FROM DATABASE_PROPERTIES WHERE PROPERTY_NAME='DEFAULT_TEMP_TABLESPACE';
SELECT TABLESPACE_NAME, BYTES_USED, BYTES_FREE FROM V$TEMP_SPACE_HEADER;
SELECT file_name,
tablespace_name, bytes, blocks, autoextensible, increment_by FROM
dba_temp_files;
SELECT * FROM DBA_TABLESPACE_GROUPS;
SELECT * FROM DBA_TABLESPACE_GROUPS;
Add and Resize Tempfiles
ALTER TABLESPACE temp1 ADD TEMPFILE '/u01/findb/db/apps_st/data/temp01a.dbf' SIZE 4096M;
ALTER DATABASE TEMPFILE '/u01/findb/db/apps_st/data/temp01a.dbf' RESIZE 4096M;
Check Autoextend for the datafiles.
select tablespace_name, file_name, bytes/1048576 File_Size_MB, autoextensible, increment_by
from dba_data_files order by file_id
Get the objects consumed by SYSAUX tablespace
SELECT * FROM V$SYSAUX_OCCUPA
Queries for UNDO Calculation
select
( select sum(bytes)/1024/1024 from dba_data_files
where tablespace_name like 'UND%' ) allocated,
( select sum(bytes)/1024/1024 from dba_free_space
where tablespace_name like 'UND%') free,
( select sum(bytes)/1024/1024 from dba_undo_extents
where tablespace_name like 'UND%') USed
from dual
SELECT (UR * (UPS * DBS)) AS "Bytes"
FROM (SELECT value AS UR FROM v$parameter WHERE name = 'undo_retention'),
(SELECT undoblks/((end_time-begin_time)*86400) AS UPS
FROM v$undostat
WHERE undoblks = (SELECT MAX(undoblks) FROM v$undostat)),
(SELECT block_size AS DBS
FROM dba_tablespaces
WHERE tablespace_name = (SELECT UPPER(value) FROM v$parameter WHERE name = 'undo_tablespace'));
SELECT undoblks/((end_time-begin_time)*86400) "Peak Undo Block Generation" FROM v$undostat WHERE undoblks=(SELECT MAX(undoblks) FROM v$undostat);
We can calculate size of UNDO_RETENTION in one query:
SELECT
d.undo_size/(1024*1024) "ACTUAL UNDO SIZE [MByte]",
SUBSTR(e.value,1,25) "UNDO RETENTION [Sec]",
ROUND((d.undo_size / (to_number(f.value) *
g.undo_block_per_sec))) "OPTIMAL UNDO RETENTION [Sec]"
FROM
(
SELECT
SUM(a.bytes) undo_size
FROM
v$datafile a,
v$tablespace b,
dba_tablespaces c
WHERE
c.contents = 'UNDO'
AND c.status = 'ONLINE'
AND b.name = c.tablespace_name
AND a.ts# = b.ts#
) d,
v$parameter e,
v$parameter f,
(
SELECT
MAX(undoblks/((end_time-begin_time)*3600*24)) undo_block_per_sec
FROM
v$undostat
) g
WHERE
e.name = 'undo_retention'
AND f.name = 'db_block_size';
Another single query to find optimum UNDO_RETENTION period;
SELECT d.undo_size/(1024*1024) as UNDO_SIZE,
SUBSTR(e.value,1,25) as UNDO_RETENTION,
ROUND((d.undo_size / (to_number(f.value) *
g.undo_block_per_sec))) as OPTIMUM_UNDO_RETENTION
FROM (
SELECT SUM(a.bytes) undo_size
FROM v$datafile a,
v$tablespace b,
dba_tablespaces c
WHERE c.contents = 'UNDO'
AND c.status = 'ONLINE'
AND b.name = c.tablespace_name
AND a.ts# = b.ts#
) d,
v$parameter e,
v$parameter f,
(
SELECT MAX(undoblks/((end_time-begin_time)*3600*24))
undo_block_per_sec
FROM v$undostat
) g
WHERE e.name = 'undo_retention'
AND f.name = 'db_block_size';
To find UNDO tablespace size according to the UNDO RETENTION period;
SELECT d.undo_size/(1024*1024) as UNDO_SIZE,
SUBSTR(e.value,1,25) as UNDO_RETENTION,
(TO_NUMBER(e.value) * TO_NUMBER(f.value) *
g.undo_block_per_sec) / (1024*1024)
as NEEDED_UNDO_SIZE
FROM (
SELECT SUM(a.bytes) undo_size
FROM v$datafile a,
v$tablespace b,
dba_tablespaces c
WHERE c.contents = 'UNDO'
AND c.status = 'ONLINE'
AND b.name = c.tablespace_name
AND a.ts# = b.ts#
) d,
v$parameter e,
v$parameter f,
(
SELECT MAX(undoblks/((end_time-begin_time)*3600*24))
undo_block_per_sec
FROM v$undostat
) g
WHERE e.name = 'undo_retention'
AND f.name = 'db_block_size';
How To Size UNDO Tablespace For Automatic Undo Management (Doc ID 262066.1)
Master Note for ORA-1555 Errors (Doc ID 1307334.1)
Oracle EBS R12 Important Information
Start & Stop the Application Services
Login as the ORACLE user who is the owner of the application file system ( APPL_TOP and Applications Technology Stack )
First, change the directory to APPL_TOP.
[oracle@oracle ~]$ cd /d01/oracle/VIS/apps/apps_st/appl
Then, execute the consolidated applications environment file (APPS<context name>.env) as follows.
[oracle@oracle appl]$ . APPSVIS_oracle.env
Then, change the directory to INST_TOP/admin/scripts.
[oracle@oracle ~]$ cd $INST_TOP/admin/scripts
Then you can start or stop the application services by running below commands through adstrtal.sh and adstpall.sh scripts.
Start Apps
[oracle@oracle scripts]$ sh adstrtal.sh
You are running adstrtal.sh version 120.15
Enter the APPS username: apps
Enter the APPS password:
Stop Apps
[oracle@oracle scripts]$ sh adstpall.sh
You are running adstpall.sh version 120.10
Enter the APPS username: apps
Enter the APPS password:
Check Concurrent Manager Status
[oracle@oracle ~]$ ps -ef|grep FNDLIBR
Start & Stop the Database and Listener
Login as the ORACLE user who is the owner of the database tier file system.
First, change the directory to RDBMS ORACLE_HOME.
[oracle@oracle ~]$ cd /d01/oracle/VIS/apps/apps_st/appl
Then execute the environment file in [RDBMS ORACLE_HOME].
[oracle@oracle ~]$ . VIS_oracle.env
Then, change the directory to ORACLE_HOME/appsutil/scripts/VIS_oracle.
[oracle@oracle ~]$ cd /d01/oracle/VIS/db/tech_st/11.1.0/appsutil/scripts/VIS_oracle
Then you can start or stop the database or listener by running below commands through the addlnctl.sh and
addbctl.sh files.
Database Start/Stop
[oracle@oracle VIS_oracle]$ sh addbctl.sh start normal
[oracle@oracle VIS_oracle]$ sh addbctl.sh stop normal
Listener Start/Stop
[oracle@oracle VIS_oracle]$ sh addlnctl.sh start VIS
[oracle@oracle VIS_oracle]$ sh addlnctl.sh stop VIS
Concurrent Requests
The concurrent requests that are executing by all users in the Oracle EBS could be monitored as and when required.
This query could be executed through the database APPS user.
SELECT REQUEST_ID, REQUESTOR, ACTUAL_START_DATE, ACTUAL_COMPLETION_DATE,
TRUNC(MOD((ACTUAL_COMPLETION_DATE-ACTUAL_START_DATE)*24,24))"Hrs",
TRUNC(MOD((ACTUAL_COMPLETION_DATE-ACTUAL_START_DATE)*24*60,60))"Min",
TRUNC(MOD((ACTUAL_COMPLETION_DATE-ACTUAL_START_DATE)*24*60*60,60))"Sec",
PROGRAM, ARGUMENT_TEXT
FROM FND_CONC_REQ_SUMMARY_V
WHERE (nvl(ACTUAL_COMPLETION_DATE,sysdate)-ACTUAL_START_DATE)*24*60*60 > 1
and ACTUAL_START_DATE like sysdate
--and ACTUAL_START_DATE like to_date('16-JAN-12','DD-MON-YY') -- to get data of exact date
ORDER BY ACTUAL_COMPLETION_DATE DESC
Cancel a Request from Backend
(1)
(2)
SELECT a.request_id, d.sid, d.serial# , c.SPID
FROM apps.fnd_concurrent_requests a,
apps.fnd_concurrent_processes b,
v$process c,
v$session d
WHERE a.controlling_manager = b.concurrent_process_id
AND c.pid = b.oracle_process_id
AND b.session_id=d.audsid
AND a.request_id = 19024108
AND a.phase_code = R;
Then kill the SPID from putty login to oracle user.
UPDATE apps.fnd_concurrent_requests
SET phase_code = 'C', status_code = 'X'
WHERE phase_code in ('P','R')
and request_id =19024108;
commit;
SELECT PROCESS pid, s.process, s.status, s.username, s.schemaname,s.client_identifier,s.osuser,s.program,s.module, s.machine, s.terminal, sql.sql_text
FROM v$session s, v$sql sql WHERE sql.sql_id(+) = s.sql_id AND s.type = 'USER';
Oracle Database Growth
select to_char(creation_time, 'RRRR Month') "Month",
sum(bytes)/1024/1024/1024 "Growth in GB"
from sys.v_$datafile
where creation_time > SYSDATE-365
group by to_char(creation_time, 'RRRR Month')
SET LINESIZE 200
SET PAGESIZE 200
COL "Database Size" FORMAT a13
COL "Used Space" FORMAT a11
COL "Used in %" FORMAT a11
COL "Free in %" FORMAT a11
COL "Database Name" FORMAT a13
COL "Free Space" FORMAT a12
COL "Growth DAY" FORMAT a11
COL "Growth WEEK" FORMAT a12
COL "Growth DAY in %" FORMAT a16
COL "Growth WEEK in %" FORMAT a16
SELECT
(select min(creation_time) from v$datafile) "Create Time",
(select name from v$database) "Database Name",
ROUND((SUM(USED.BYTES) / 1024 / 1024 ),2) || ' MB' "Database Size",
ROUND((SUM(USED.BYTES) / 1024 / 1024 ) - ROUND(FREE.P / 1024 / 1024 ),2) || ' MB' "Used Space",
ROUND(((SUM(USED.BYTES) / 1024 / 1024 ) - (FREE.P / 1024 / 1024 )) / ROUND(SUM(USED.BYTES) / 1024 / 1024 ,2)*100,2) || '% MB' "Used in %",
ROUND((FREE.P / 1024 / 1024 ),2) || ' MB' "Free Space",
ROUND(((SUM(USED.BYTES) / 1024 / 1024 ) - ((SUM(USED.BYTES) / 1024 / 1024 ) - ROUND(FREE.P / 1024 / 1024 )))/ROUND(SUM(USED.BYTES) / 1024 / 1024,2 )*100,2) || '% MB' "Free in %",
ROUND(((SUM(USED.BYTES) / 1024 / 1024 ) - (FREE.P / 1024 / 1024 ))/(select sysdate-min(creation_time) from v$datafile),2) || ' MB' "Growth DAY",
ROUND(((SUM(USED.BYTES) / 1024 / 1024 ) - (FREE.P / 1024 / 1024 ))/(select sysdate-min(creation_time) from v$datafile)/ROUND((SUM(USED.BYTES) / 1024 / 1024 ),2)*100,3) || '% MB' "Growth DAY in %",
ROUND(((SUM(USED.BYTES) / 1024 / 1024 ) - (FREE.P / 1024 / 1024 ))/(select sysdate-min(creation_time) from v$datafile)*7,2) || ' MB' "Growth WEEK",
ROUND((((SUM(USED.BYTES) / 1024 / 1024 ) - (FREE.P / 1024 / 1024 ))/(select sysdate-min(creation_time) from v$datafile)/ROUND((SUM(USED.BYTES) / 1024 / 1024 ),2)*100)*7,3) || '% MB' "Growth WEEK in %"
FROM (SELECT BYTES FROM V$DATAFILE
UNION ALL
SELECT BYTES FROM V$TEMPFILE
UNION ALL
SELECT BYTES FROM V$LOG) USED,
(SELECT SUM(BYTES) AS P FROM DBA_FREE_SPACE) FREE
GROUP BY FREE.P;
Login as the ORACLE user who is the owner of the application file system ( APPL_TOP and Applications Technology Stack )
First, change the directory to APPL_TOP.
[oracle@oracle ~]$ cd /d01/oracle/VIS/apps/apps_st/appl
Then, execute the consolidated applications environment file (APPS<context name>.env) as follows.
[oracle@oracle appl]$ . APPSVIS_oracle.env
Then, change the directory to INST_TOP/admin/scripts.
[oracle@oracle ~]$ cd $INST_TOP/admin/scripts
Then you can start or stop the application services by running below commands through adstrtal.sh and adstpall.sh scripts.
Start Apps
[oracle@oracle scripts]$ sh adstrtal.sh
You are running adstrtal.sh version 120.15
Enter the APPS username: apps
Enter the APPS password:
Stop Apps
[oracle@oracle scripts]$ sh adstpall.sh
You are running adstpall.sh version 120.10
Enter the APPS username: apps
Enter the APPS password:
Check Concurrent Manager Status
[oracle@oracle ~]$ ps -ef|grep FNDLIBR
Start & Stop the Database and Listener
Login as the ORACLE user who is the owner of the database tier file system.
First, change the directory to RDBMS ORACLE_HOME.
[oracle@oracle ~]$ cd /d01/oracle/VIS/apps/apps_st/appl
Then execute the environment file in [RDBMS ORACLE_HOME].
[oracle@oracle ~]$ . VIS_oracle.env
Then, change the directory to ORACLE_HOME/appsutil/scripts/VIS_oracle.
[oracle@oracle ~]$ cd /d01/oracle/VIS/db/tech_st/11.1.0/appsutil/scripts/VIS_oracle
Then you can start or stop the database or listener by running below commands through the addlnctl.sh and
addbctl.sh files.
Database Start/Stop
[oracle@oracle VIS_oracle]$ sh addbctl.sh start normal
[oracle@oracle VIS_oracle]$ sh addbctl.sh stop normal
Listener Start/Stop
[oracle@oracle VIS_oracle]$ sh addlnctl.sh start VIS
[oracle@oracle VIS_oracle]$ sh addlnctl.sh stop VIS
Concurrent Requests
The concurrent requests that are executing by all users in the Oracle EBS could be monitored as and when required.
This query could be executed through the database APPS user.
SELECT REQUEST_ID, REQUESTOR, ACTUAL_START_DATE, ACTUAL_COMPLETION_DATE,
TRUNC(MOD((ACTUAL_COMPLETION_DATE-ACTUAL_START_DATE)*24,24))"Hrs",
TRUNC(MOD((ACTUAL_COMPLETION_DATE-ACTUAL_START_DATE)*24*60,60))"Min",
TRUNC(MOD((ACTUAL_COMPLETION_DATE-ACTUAL_START_DATE)*24*60*60,60))"Sec",
PROGRAM, ARGUMENT_TEXT
FROM FND_CONC_REQ_SUMMARY_V
WHERE (nvl(ACTUAL_COMPLETION_DATE,sysdate)-ACTUAL_START_DATE)*24*60*60 > 1
and ACTUAL_START_DATE like sysdate
--and ACTUAL_START_DATE like to_date('16-JAN-12','DD-MON-YY') -- to get data of exact date
ORDER BY ACTUAL_COMPLETION_DATE DESC
Cancel a Request from Backend
(1)
SELECT a.request_id, d.sid, d.serial#
,d.osuser,d.process , c.SPID
FROM apps.fnd_concurrent_requests a,
apps.fnd_concurrent_processes b,
v$process c,
v$session d
WHERE a.controlling_manager =
b.concurrent_process_id
AND c.pid = b.oracle_process_id
AND b.session_id=d.audsid
AND a.request_id in (16595668)(2)
SELECT a.request_id, d.sid, d.serial# , c.SPID
FROM apps.fnd_concurrent_requests a,
apps.fnd_concurrent_processes b,
v$process c,
v$session d
WHERE a.controlling_manager = b.concurrent_process_id
AND c.pid = b.oracle_process_id
AND b.session_id=d.audsid
AND a.request_id = 19024108
AND a.phase_code = R;
Then kill the SPID from putty login to oracle user.
UPDATE apps.fnd_concurrent_requests
SET phase_code = 'C', status_code = 'X'
WHERE phase_code in ('P','R')
and request_id =19024108;
commit;
SELECT PROCESS pid, s.process, s.status, s.username, s.schemaname,s.client_identifier,s.osuser,s.program,s.module, s.machine, s.terminal, sql.sql_text
FROM v$session s, v$sql sql WHERE sql.sql_id(+) = s.sql_id AND s.type = 'USER';
Oracle Database Growth
select to_char(creation_time, 'RRRR Month') "Month",
sum(bytes)/1024/1024/1024 "Growth in GB"
from sys.v_$datafile
where creation_time > SYSDATE-365
group by to_char(creation_time, 'RRRR Month')
SET LINESIZE 200
SET PAGESIZE 200
COL "Database Size" FORMAT a13
COL "Used Space" FORMAT a11
COL "Used in %" FORMAT a11
COL "Free in %" FORMAT a11
COL "Database Name" FORMAT a13
COL "Free Space" FORMAT a12
COL "Growth DAY" FORMAT a11
COL "Growth WEEK" FORMAT a12
COL "Growth DAY in %" FORMAT a16
COL "Growth WEEK in %" FORMAT a16
SELECT
(select min(creation_time) from v$datafile) "Create Time",
(select name from v$database) "Database Name",
ROUND((SUM(USED.BYTES) / 1024 / 1024 ),2) || ' MB' "Database Size",
ROUND((SUM(USED.BYTES) / 1024 / 1024 ) - ROUND(FREE.P / 1024 / 1024 ),2) || ' MB' "Used Space",
ROUND(((SUM(USED.BYTES) / 1024 / 1024 ) - (FREE.P / 1024 / 1024 )) / ROUND(SUM(USED.BYTES) / 1024 / 1024 ,2)*100,2) || '% MB' "Used in %",
ROUND((FREE.P / 1024 / 1024 ),2) || ' MB' "Free Space",
ROUND(((SUM(USED.BYTES) / 1024 / 1024 ) - ((SUM(USED.BYTES) / 1024 / 1024 ) - ROUND(FREE.P / 1024 / 1024 )))/ROUND(SUM(USED.BYTES) / 1024 / 1024,2 )*100,2) || '% MB' "Free in %",
ROUND(((SUM(USED.BYTES) / 1024 / 1024 ) - (FREE.P / 1024 / 1024 ))/(select sysdate-min(creation_time) from v$datafile),2) || ' MB' "Growth DAY",
ROUND(((SUM(USED.BYTES) / 1024 / 1024 ) - (FREE.P / 1024 / 1024 ))/(select sysdate-min(creation_time) from v$datafile)/ROUND((SUM(USED.BYTES) / 1024 / 1024 ),2)*100,3) || '% MB' "Growth DAY in %",
ROUND(((SUM(USED.BYTES) / 1024 / 1024 ) - (FREE.P / 1024 / 1024 ))/(select sysdate-min(creation_time) from v$datafile)*7,2) || ' MB' "Growth WEEK",
ROUND((((SUM(USED.BYTES) / 1024 / 1024 ) - (FREE.P / 1024 / 1024 ))/(select sysdate-min(creation_time) from v$datafile)/ROUND((SUM(USED.BYTES) / 1024 / 1024 ),2)*100)*7,3) || '% MB' "Growth WEEK in %"
FROM (SELECT BYTES FROM V$DATAFILE
UNION ALL
SELECT BYTES FROM V$TEMPFILE
UNION ALL
SELECT BYTES FROM V$LOG) USED,
(SELECT SUM(BYTES) AS P FROM DBA_FREE_SPACE) FREE
GROUP BY FREE.P;
Create Tablespace and Users
Create a New tablespace
Login to SYS user.
CREATE TABLESPACE XXCUST_TABLESPACE
DATAFILE ‘/d01/oracle/VIS/db/apps_st/data/data01.dbf'
SIZE 1024M
EXTENT MANAGEMENT LOCAL UNIFORM SIZE 128K;
Create a New User and Grant
Login to SYS user.
CREATE USER XXCUST IDENTIFIED BY ORACLE
DEFAULT TABLESPACE XXCUST_TABLESPACE TEMPORARY TABLESPACE TEMP;
GRANT RESOURCE, CONNECT TO XXCUST;
Tuesday, January 31, 2012
Reset Linux root and Oracle sys password
Reset Linux root user Password
Method 1
1. Boot the computer with Linux Installation CD.
2. Enter into Linux Rescue mode by enering the following command in boot screen. boot: linux rescue
3. When the shell prompt appears, enter the following commands to change root password.
$ chroot /mnt/sysimage
$ passwd
Method 2
1. When you see the grub screen press 'e' on linux which contains the word 'kernell' press 'e'
2. Go to end of that line and write 'linux single'
3. Then press 'esc' twice and press 'b' to reboot the system
4. Now wait for the prompt and type the following command to reset the password for root.
#passwd root
The above steps will prompt you to enter your new password.
Reset Oracle sys user Password
$ orapwd file=/d03/oracle/TEST/db/tech_st/11.1.0/dbs/orapwTEST password=oracle entries=5
This is your new sys password. After you log in as sys you can change it and create new passwords for system etc.
Subscribe to:
Posts (Atom)